
GaliaTor Ausprobieren
Zum direkten Ausprobieren des Spiel wähle dir hier bitte einen Spielernamen und ein Passwort. Die Email ist optional, doch stehen dir ohne diese Funktionen wie „Passwort vergessen“ nicht zur Verfügung.


GaliaTor ist ein kostenloses Browsergame!
Spiele Online und werde Patrizier in Nord- und Ostsee
Aktuelle Features
- 64 verschiedene Städte
- 24 Handel- und produzierbare Waren
- 23 Produktionsgebäude von Getreidefarm bis Seilerei
- 3 Schiffstypen
- betretbare städtische Gebäude
- frei verschiebbare Landkarten
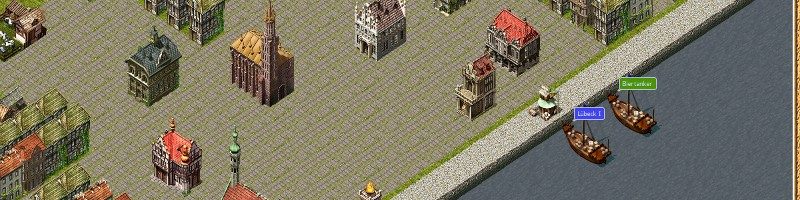
- frei verschiebbare 3D ISO Stadtansicht
- Aufbau der Städte und Bestimmung des Aussehens durch die Spieler
- freie Schiffsreisen, von jedem zu jedem Punkt auf der Karte
- Piraterie und andere illegale Aktionen
- Kontorsverwalter
Specials
- keine Plugins wie Flash notwendig
- reines HTML, Javascript und Bilder
- Smartphone tauglich (getestet mit Opera Mobil)
- spielbar mit Wii und PS3
- Ingame-Chat
- kein Pay2Win!
- automatische Handelsrouten
Planung und Entwicklung
- Landwege
- erweiterte Spielkarten wie Mittelmeer, Afrika, Asien, …
Spielinhalt

Kartenteil
Den Spieler erwartet die anspruchsvolle Aufgabe, sein Geschick beim Handel im Nord- und Ostseeraum zwischen London und Nowgorod unter Beweis zu stellen. Mit dem Aufbau seines Imperiums ergeben sich weitere Spielelemente, welche ihn vor neue Aufgaben stellen. Dabei ist GaliaTor keine reine Handelssimulation, sondern bietet neben zahlreichen Aufbau-Elementen eine entsprechende Portion Action und Strategie.

Schnigge
Gestartet wird als ambitionierter Krämer in einer der aktuell 64 Städte. Im Besitz des frischen Händlers befinden sich eine Schnigge und 15.000 Goldstücke in bar. Durch den Kauf und Verkauf von Waren in den verschiedenen Städten, Erfüllung von Aufträgen, oder Schatzsuchen vermehrt sich das eigene Vermögen Stück für Stück. Der Bau von eigenen Produktionsbetrieben kurbelt die Wirtschaft an und lässt die Städte zu ungeahnten Größen wachsen.

Pirat
Wer keine Angst vor einer eventuellen Anklage hat, kann seiner Konkurrenz mit zwielichtigen Gestalten zu Leibe rücken. Piraten vor der Heimatstadt machen vielen Händler das Leben schwer. Aus schlecht bewachten Lagerhäusern wechseln Waren den Eigentümer oder die eigenen Arbeiter verlassen auf Grund eines Gerüchtes die Betriebe. Wer es schafft, all diese Probleme zu umschiffen, den erwarten Ruhm und Ehre.

Rathaus
Der gesellschaftliche Aufstieg zum Bürgermeister oder Eldermann stellt den Spieler vor politische Aufgaben. Als Bürgermeister liegt das Entwickeln der Heimatstadt zu einem Piratennest oder zu einem angesehenen Handelszentrum in seiner Hand. Als Eldermann trifft er weitreichende Entscheidungen und beeinflusst die Spielgeschicke aller Händler und Piraten.